A task must be created if you need to move inventory into or out of an Unavailable or Unusable location.
- Create a new task using one of two options.
- Option 1: New Warehouse/Vendor Action Task
- Option 2: personalize your quick add options to include “Task,” select it, and choose Warehouse/Vendor Action

Task Information Section

- Select Sub-Type Inventory Transfer
- The title will auto-populate after the task is saved.
- NOTE – You can override the auto-population by checking the Override Name box.
- Change Requestor if necessary
- NOTE – It will auto-populate to the user’s name.
- Change Location to the Primary Location of the item.
- NOTE – It will auto-populate to the user’s main location.
Directions & Notes Section

- Enter Directions to Task Recipient
- NOTE – Add clear and specific directions.
- Example 1- if a single item:
- MRC02970 has been inspected & approved. Please transfer all inventory from SUA to SHW.
- Example 2- if multiple items:
- The following items have been inspected & approved. Please transfer all inventory from SUA to SHW.
- Example 1- if a single item:
- NOTE – Add clear and specific directions.
- Adjust Priority if necessary
- NOTE – For Priority: If the item has a tight turnaround to meet a customer ship date, set the Priority as HIGH.
- NOTE – High = 1 business day/Medium = 2 business days/Low = 3 business days
- Enter Due Date
Task Status Section

- Change the Current Assignee if necessary.
- NOTE – The system will default to the Inventory Management team that matches the Location.
- NOTE – If you’re requesting transfers for multiple items housed in different warehouses, you will need to enter separate task requests to be assigned to different people.
- Leave Overall Status as Not Started.
Related Records Section

- Enter Item number if applicable
- NOTE – If it is multiple items leave blank
- Save
- Double-check the task to make sure all information is saved correctly.
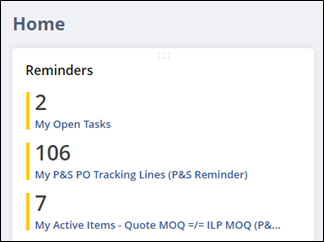
Your open task will appear on the Reminders portlet.

