- Login in to NetSuite
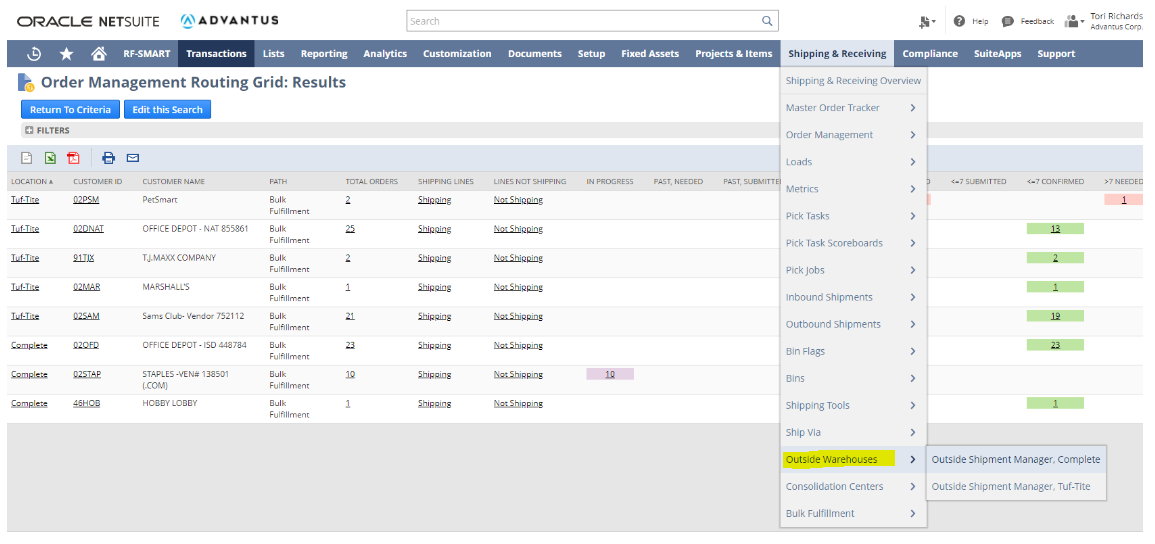
- Go to “Shipping & Receiving”, “Outside Warehouses”, and click either “Outside Shipment Manager, Complete” or “Outside Shipment Manager, Tuf-Tite”.
(Depending on what location/customer you are sending docs for)

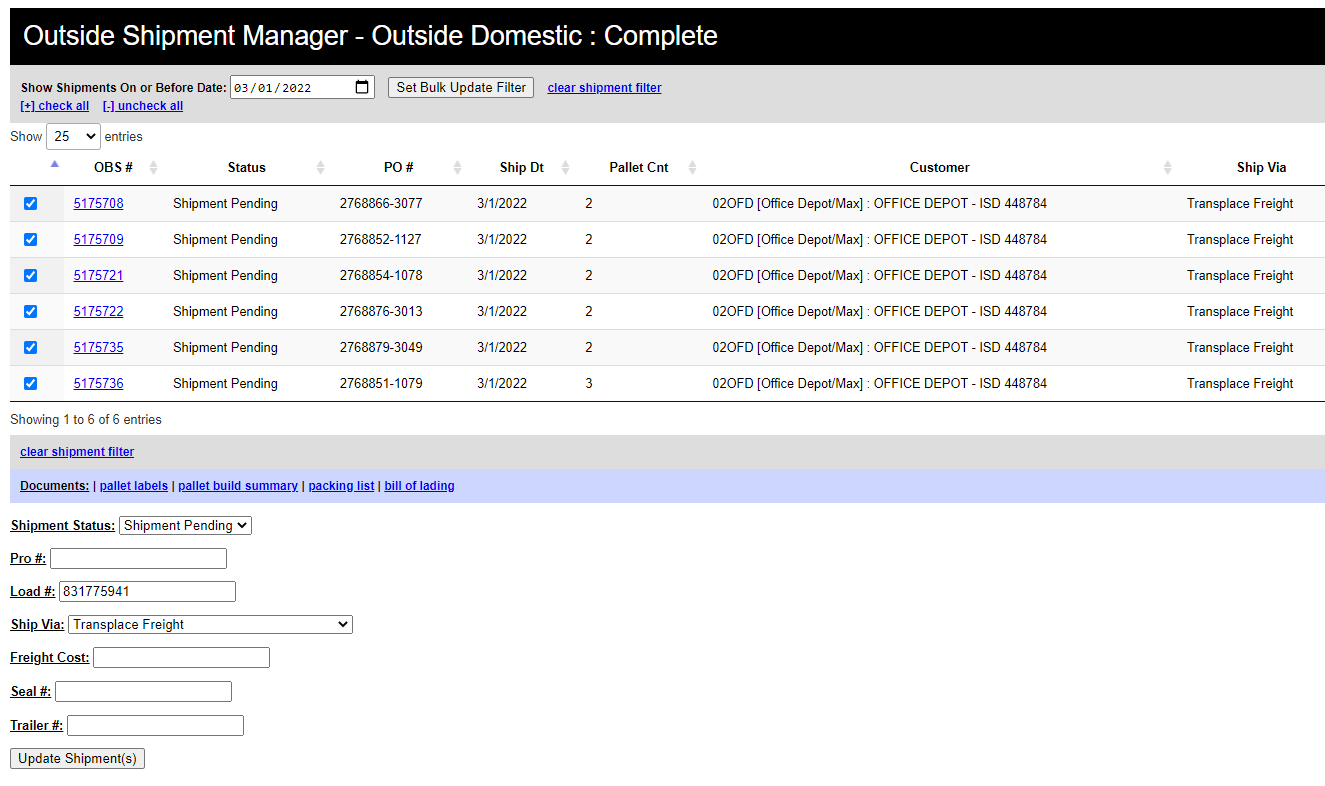
- Enter the ship date at the top.

- Change the entries to 100.

- Filter by “ship date” or “customer” by clicking the headers.
- You can also use the search bar on the right to type in the customer or ship date.
- Ex. 02OFD
- Ex. 2/25/2022
- You can also use the search bar on the right to type in the customer or ship date.

- Look for the POs you processed. “Ctrl Find” can be helpful.
- Click the check boxes on the left for all the POs from the release email that you processed.
- Then click “Set Bulk Update Filter”

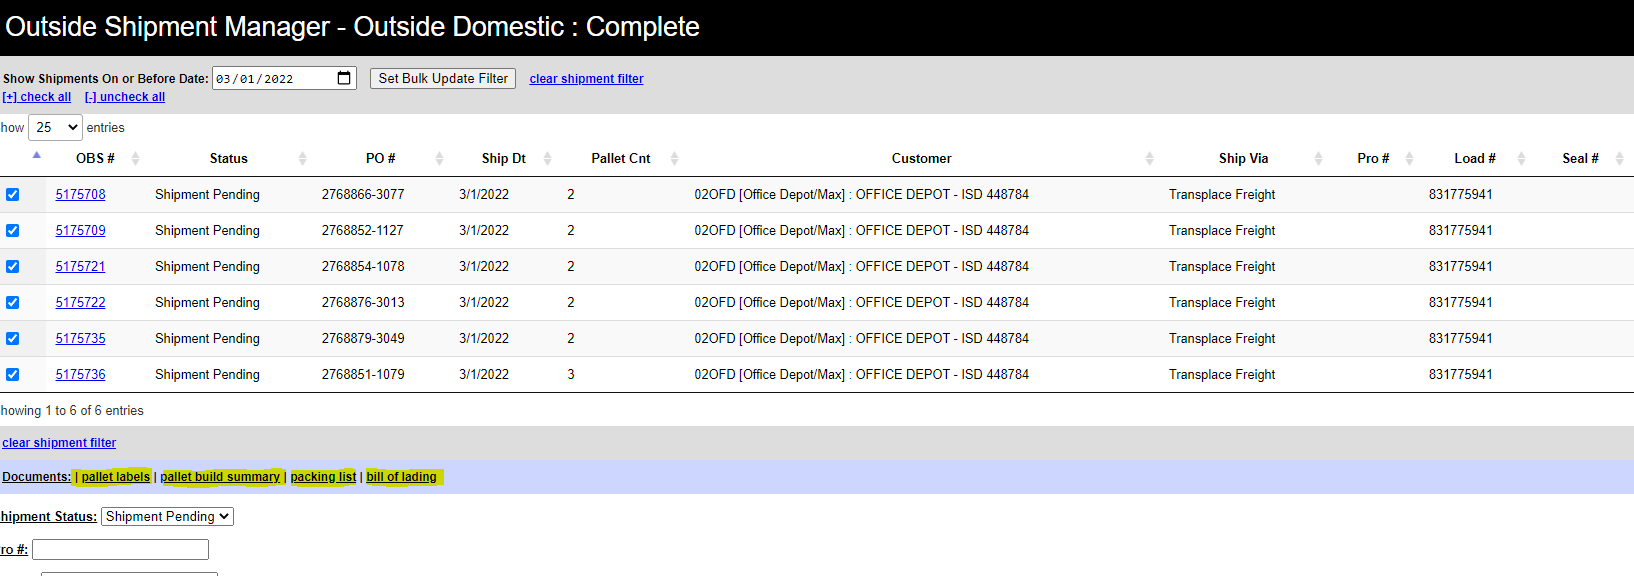
- Your screen will now look something like this.

- Hold down “Ctrl” while clicking the highlighted.

-
- The files will come up at the bottom of the page or in the top corner in the Chrome download folder.
- Click one at a time.
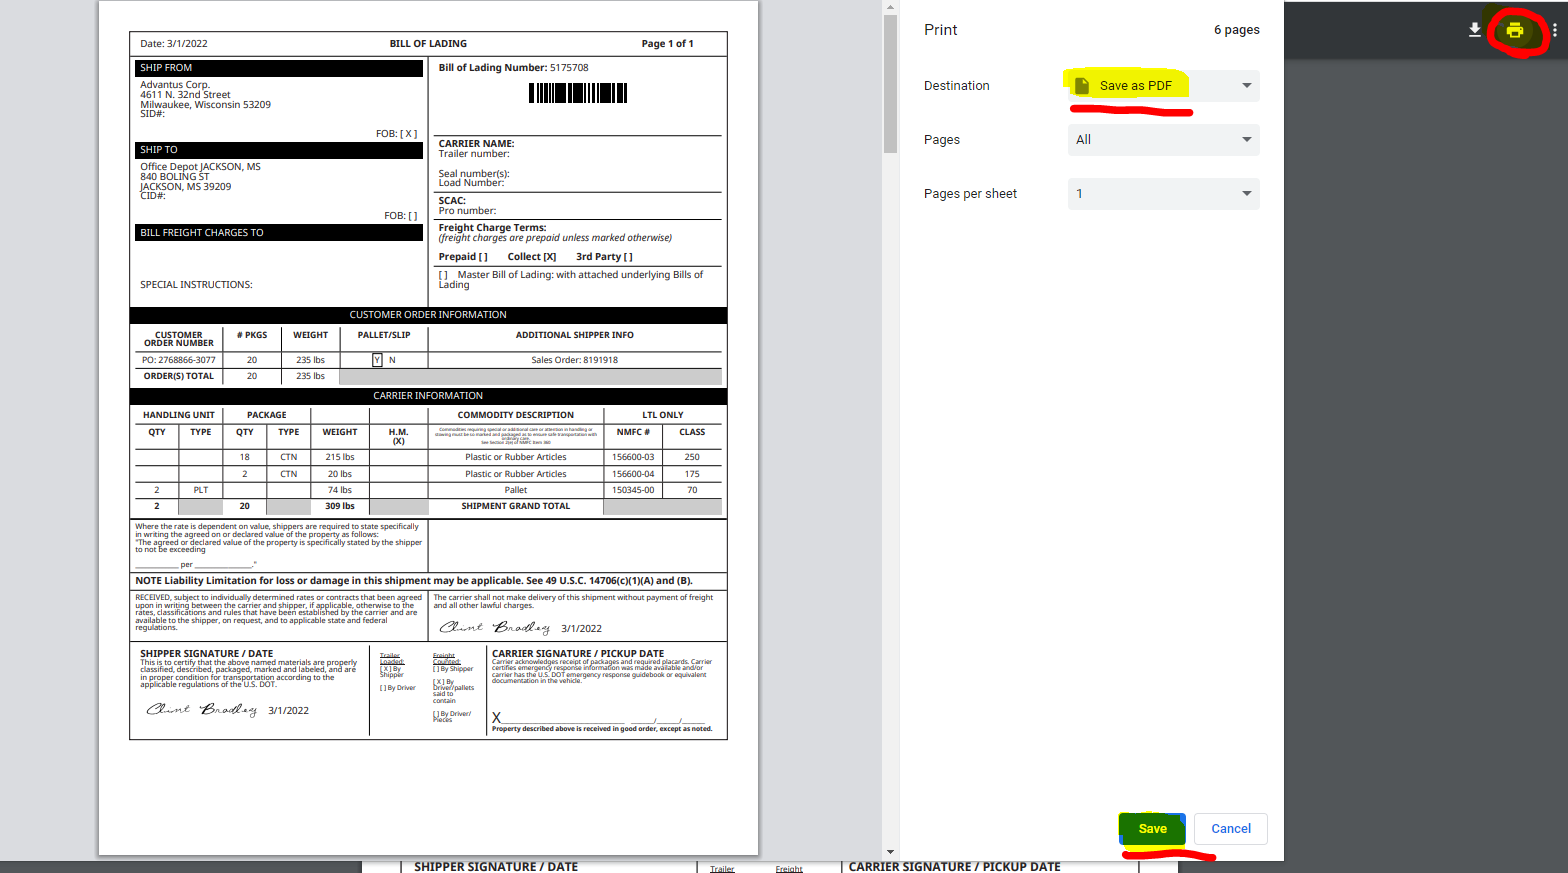
- Click “Print”
- “Save as PDF”
- Click “Save”
- Save in related customer folder using the following naming convention: Customer Name – Ship Doc Type – Date

