There are currently 3 ways customer remittances are created in NetSuite (EDI, manual, and import) and will show in the Customer Remittance Manager (CRM).
EDI 820 documents
- If the customer is setup with 820s, the records will appear in the CRM. No action is needed by A/R regarding the creation of these remittances.
Manually-key
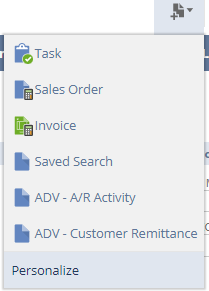
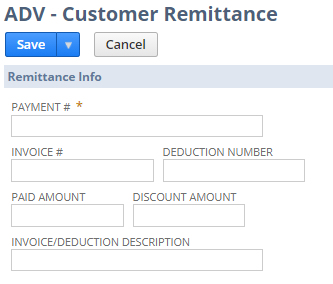
- Go to the ADV – Customer Remittance record using the quick links or the new bar
- How to add to new bar:
- Hover over new bar in top right corner
- Select Personalize
- How to add to new bar:

-
-
- Select the checkbox next to “ADV – Customer Remittance”
- Hit Save
-
- Enter the information in the first section (Remittance Info)

- Select Save
CSV scripted import
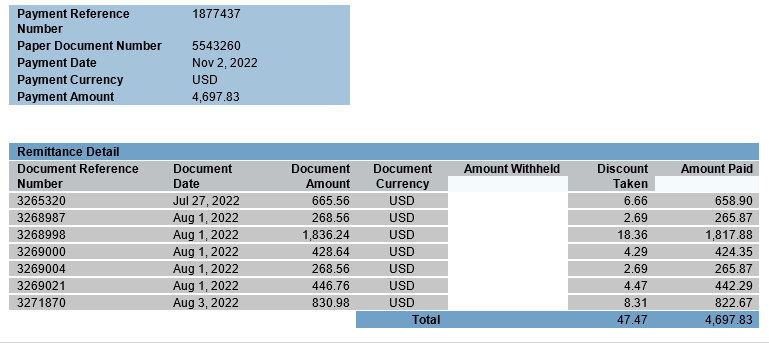
- Create or download an excel document with the payment details
- To create spreadsheet from email, copy and paste information from email
- Add payment # column is not included


- Change currency columns to be formatted as General
- Confirm no rows have dollar signs or commas
- Save on R drive in the current month or day (if known)
- Save as Customer Name + Payment Number
- Example: Office Depot 5543260
- Go to the Customer Remittance Manager (CRM) using quick link
- Select Create Import button

- Drag and drop the CSV from the R drive to the drag and drop section
- Only 1 csv can be imported at a time
![]()
- Select Save or Save & New (if you have more to import)
- If you choose Save & New, the Import Type of Customer Remittance will need to be selected
- File will begin to import and show in the CRM
- An email will be sent with the import successes or failures. Another email will be sent when the upload is complete
- If no email is received and records do not appear, ensure the file was a CSV
