Bitwarden is a secure vault for password storage. It can be used to save passwords, usernames, security questions, card info, etc. and the websites they go with. On top of that, you can also attach an Authenticator along with it. Bitwarden is a great way to shared logins with co-workers as well as you can gain access to Collections as well.
It is recommended you use Chrome or Firefox for Bitwarden. Chrome has a nice add-in (shown at the bottom) that helps with use and Internet Explorer has been known to have issues with Bitwarden.
Getting Access to Bitwarden
If you already have an account, you can login to Bitwarden here: https://vault.bitwarden.com/#/
If you are new to Advantus, your supervisor may have already put in the request for Bitwarden access. If not, you or they can send in a help ticket to IT at itsupport@advantus.com or https://advantuscorp.atlassian.net/servicedesk/customer/portal/1/group/-1 to request access. The Collection access required should be listed in the request as well. If you do not know what Collection you need access to, please ask your supervisor. Once the request is sent, IT will send you an email invite to Bitwarden. Once you follow the instructions on the invite and create a login, you will want to respond to the IT personnel in question so they can then approve your account.
- If not already done so: request access through ticket
- Wait for email invitation
- Create account through email invitation
- Enable 2-Step Login using an authenticator app or email
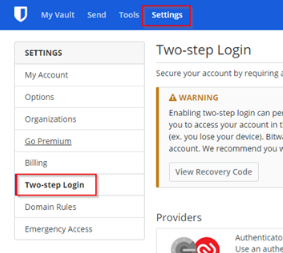
- If you would prefer to use a premium option like a hardware key contact IT and we can enable those for you
- Let IT know account has been created
- IT will approve the account
When creating your account, please make sure the Master Password is not a password you normally use. This is very important as that password is what allows you, or others who may get your password, access to sensitive information.
A strong password is required. If you have trouble coming up with one we suggest using a passphrase instead of random characters that will be easy to forget. Think “smelly-cheesetastesgood” rather than “Ad7&*uj4”.
Navigating Bitwarden
Here is a quick run-down of what you will see in Bitwarden:
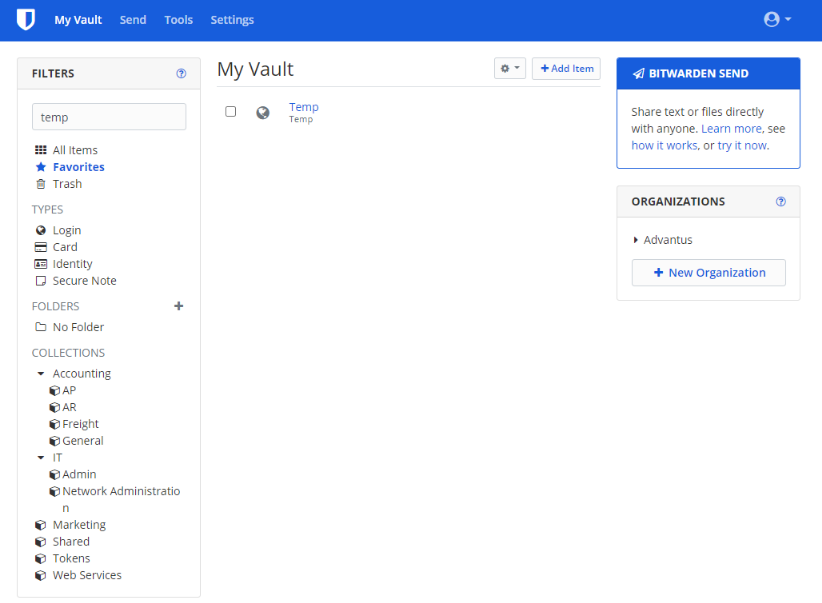
- My Vault is a list of your different saved passwords either personal or from Collections. You can filter the types of items on the left. By default it will show All Items. From there you can choose the different types, Folders (which are personal folders you can make), and Collections that you are part of. If you do not see a Collection, it means you are not part of it. You can speak with your supervisor to see if you should or not as well as contact IT. In the center you will see the name of the saved field as well as the Username underneath it.
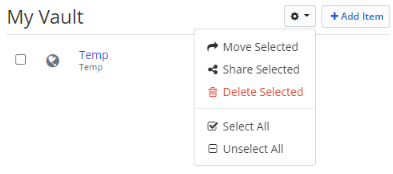
- The Gear option allows you to Move, Share, or Delete selected passwords (using the checkbox to the left of them or using the Select All from the gear). Be careful about deleting passwords.
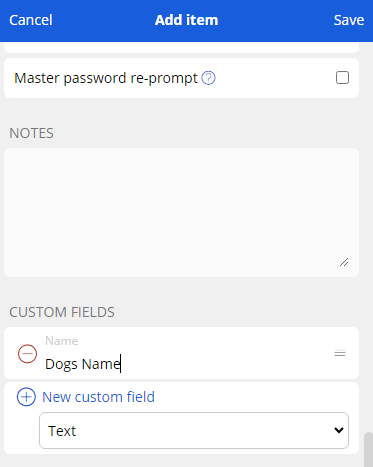
- Clicking Add Item will start to add a new Login/Card/Etc. to your Vault. You can add a display Name that will show in the vault along with all the fields needed for a password login. URI 1 is the website that it is needed for. You can organize your passwords under Folders which can be created from your My Vault on the left. You can add custom fields for extra information such as security questions.
Ownership is important. By default the password will be owned by you, the user, and only visible by you as well. You can add it to a Collection by changing this to the correct Organization instead (Advantus) which will then give you the option to add it to a Collection under Advantus.
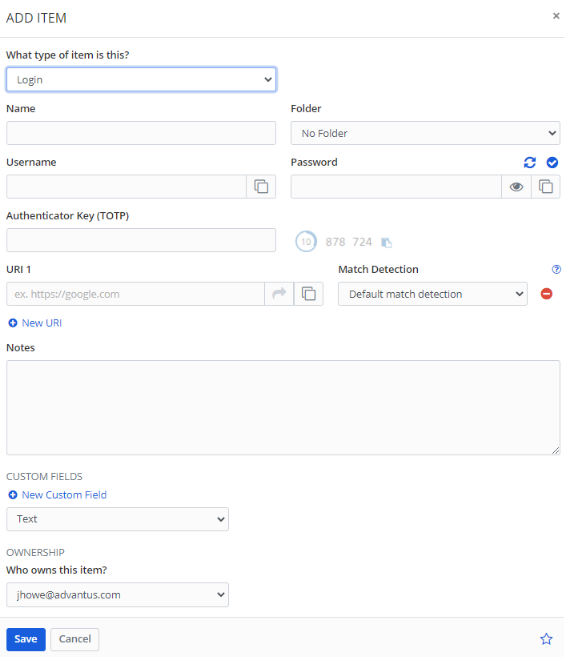 If you have a login that uses 2 factor you can use Bitwarden to fill out those prompts for you by filling out the Authenticator Key (TOTP) field. This takes the place of an authenticator app. When you get the QR Code to scan there is usually a link to get the raw data (It likely will say something like can’t read QR code) Just paste this data into the field. When you go to use that login it will automatically copy the one time code to the clipboard where you can then paste into that field.
 - By left clicking a password, you will be given a similar screen to creating a new password. Here you can view the information including the password as needed. You can also edit the item, so be careful and unless you intend to do so, either use Cancel or the X button in the top right to exit without saving.
You can also Delete the password in the bottom right or Favorite it using the star. Favoriting the field will add it to your Favorites filter in My Vault.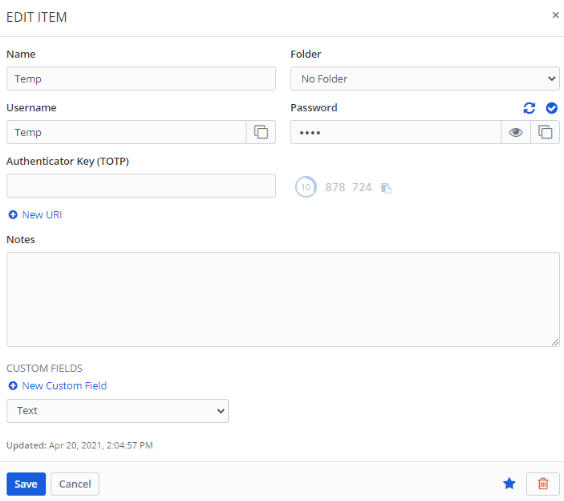
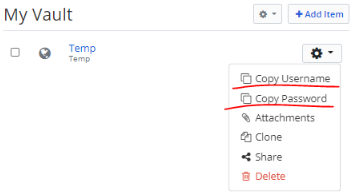
- Instead of clicking the name itself, if you use the gear to the right of the password, you can choose to copy the Username and Password instead.
Chrome Add-in
For ease of use, Chrome has an add-in that once logged into, it allows you to place in passwords automatically. When on a login screen of a website that has a password in Bitwarden, by clicking the add-in, you will get this dropdown where you can left click the Password and it will attempt to auto fill the username and password.
You can download the addin here: Bitwarden Chrome Addin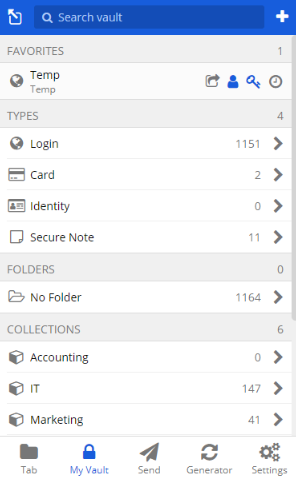
Adding Personal Information for Prefill Forms
With Bitwarden you can also store your personal information such-as name, address, phone number, email, etc… This will allow you populate forms online by clicking a button the same way you would to add a username and password. Here is how to set that up.
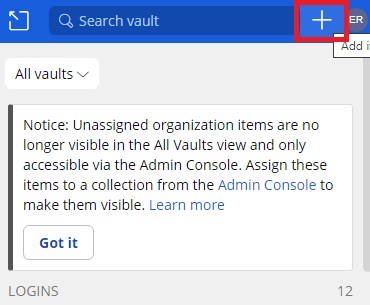
- Go to you Bitwarden Chome Addin and click on the plus sign
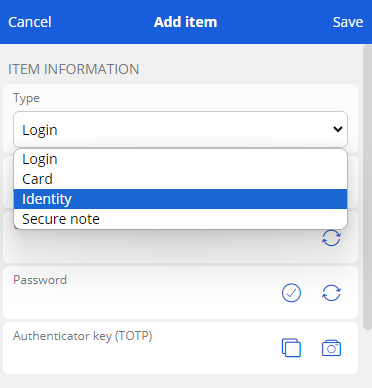
- In the Type drop down list Select “Identity”.
- Fill out the fields you would normally need to fill in an online form.
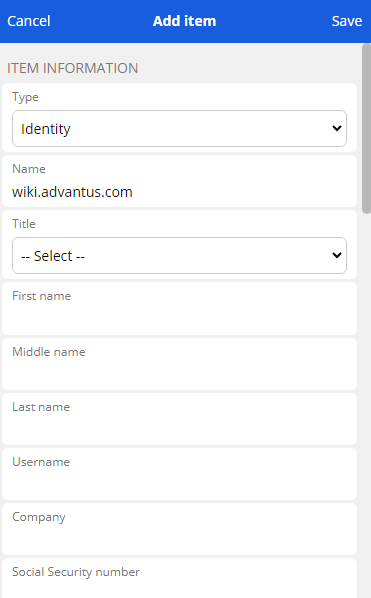
- If you would like to add a custom field to use you can scroll down from the above screenshot and find the section to add a custom field.
