Amazon sales can peak and dive so it is important to check the inventory of our Seller Central accounts daily – you may have a month’s worth of Cableyoyos one day and then you get the buy box overnight and need to replenish inventory ASAP. In general, you want to maintain a month’s worth as “available.”
It is also worth mentioning that Amazon is always making changes to their portals so while this may be the most efficient method today, a better way may be added or discovered by you tomorrow.
Begin by logging into Seller Cental. Login information is located in Bitwarden.
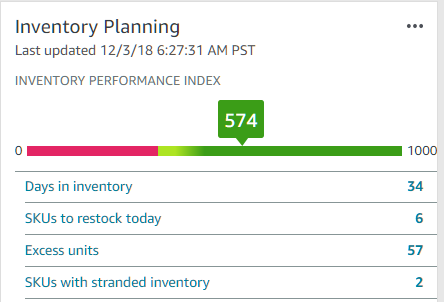
Note: The Inventory Performance Index score needs to stay above 350 to avoid the limitations and additional fees. A score higher than 450 means your inventory is performing well and a score of 550 or above indicates that your FBA inventory is a “top performer.” Keep an eye on it to make sure we are on the right track.
- Click on SKUs to restock today– this is the minimum of what you should order today. Amazon doesn’t take into account how long the inbound process can take for shipments so you should also review the inventory outside of these recommendations.

- To check additional products that are NOT listed in the Amazon’s recommendations, go to the top navigation and click on Inventory and select Manage Inventory
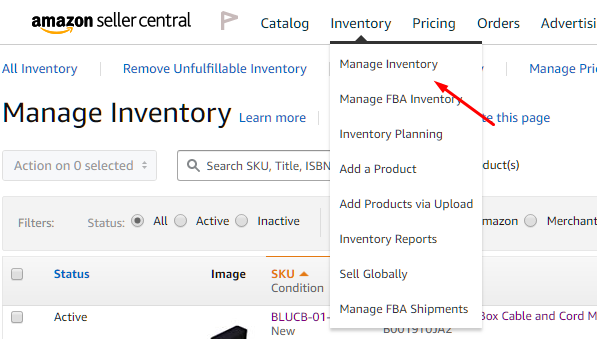
- Review the current inventory for all items, after you’re used to the sales patterns, certain available inventory levels may stand out to you as being low. If you are unsure, click on the item number of an item to see the prior 90, 30, and 7 day sales.


*This item is not on the recommended replenishment list but notice that 12 eaches sold over the last 30 days and there are only 7 in available inventory so this item also needs to be replenished. Keep in mind that you may have already shipped out inventory for this item and it just hasn’t arrived to the DC yet so keep track of what you have already sent. Too much inventory will result in additional fines and not enough will cause the product to lose ranking and buy box eligibility (the product doesn’t instantly recuperate after inventory has arrived, it can take months).
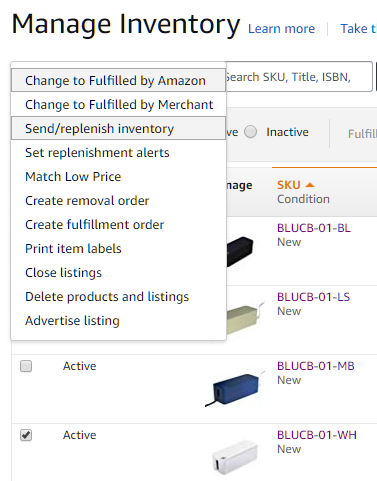
- After reviewing available inventory, select all items for which you plan send in inventory and check Netsuite that we have this inventory available to send. If it turns out we don’t have it but the replenishment process within Seller Central, you will end up having to delete the entire thing and start over. Once you have confirmed we have the inventory to send, click on the Action drop down menu and select Send/replenish inventory.
- Select Yes, Continue

- Select Case-packed products. Unless otherwise directed, we never ship items in anything less than MOQ.

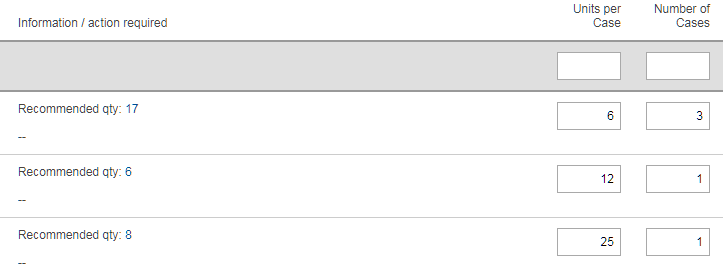
- Fill in the units per case and number of cases quantities. Due to MOQs, you will often have to send a little more than what the “recommended quantity.” Click Continue.
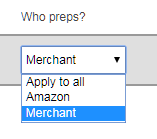
- Select Merchant under the dropdown menu for “Who preps?” Click Continue.
- The next screen confirms our understanding that all of the items we are shipping should have a manufacturer barcode in order to be checked in at the DC. At this time, all our items use the manufacturer barcode over the Amazon label so just click Continue.
- Amazon chooses where your shipments will go. They will often split up your shipment but they will not require case packs to be broken up. Click Approve & continue, then click on Work on shipment.
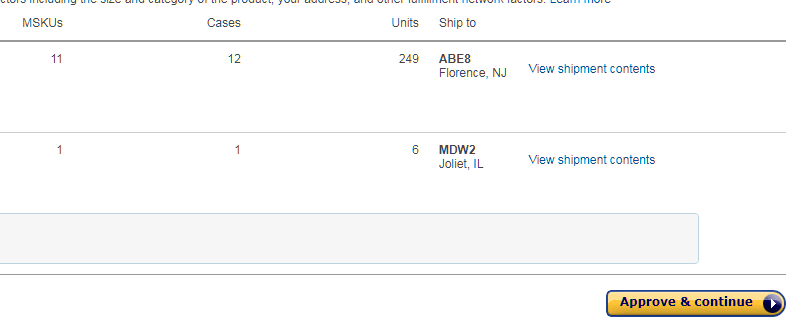
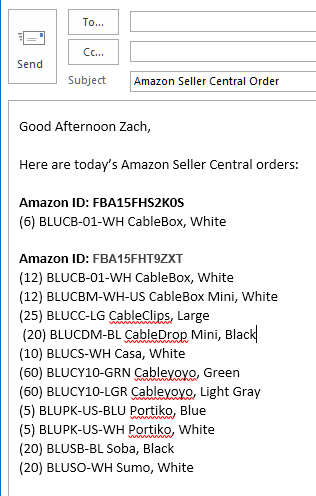
- Simultaneously fill out your email that you will send to Zach Baker in customer service – separate by the Amazon assigned Shipment ID:
- After the shipments are approved, you will review the shipment contents, shipping service, and the shipment packing. The shipping method can be left as small parcel delivery because we aren’t shipping a pallet and the shipping carrier can be left on UPS, for now (you will determine which is cheaper after you fill in the box information. For shipment packing, choose Everything in one box if you are only shipping one case pack. If you are shipping multiple items/cases, the option for One SKU per box will appear as an option.
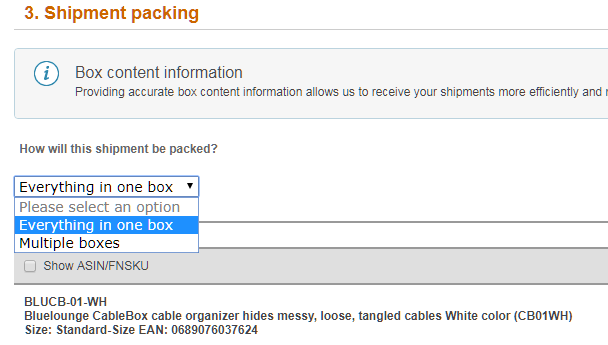
- Fill out the weight and dimensions of each case pack or master pack to be shipped then click Confirm, followed by Calculate, but do not accept the charges yet. First, take a quick mental note of estimated cost and then return to the top and change the carrier selection to FedEx to determine which is the estimated cheaper cost, then check the box to agree to the terms and conditions and accept the charges.
- Click Print box labels, but don’t print them, simply save them here:S:Sales & MarketingCustomersAmazonSELLER CentralShipping Labels Save them as the shipping ID and today’s date. Attach to the email for customer service.

- Finally, click on Complete shipment. If you have another shipment with another shipment ID to work on then select Work on another shipment and repeat steps 13-16, otherwise, send the email to customer service with the box labels attached.
