Printing Catalogs on the Konica Minolta AccurioPress C3070 (Optimus Prime)
- Put the 11×17 catalog paper (118gsm glossy) in Tray 3 (LCT1) of the printer. This tray should be used for catalog printing because the paper travels in a straight line through the rollers from this tray. (Need more paper? Use the graphics@advantus.com Amazon account and look in our past orders. The paper is Futura Laser Gloss 17 x 11-Inch, 80 lb text, 96-Brightness, White Glossy Paper (500 Sheets per Ream) )
- YOU MUST CHANGE THE PAPER SETTING ON THE PRINTER BEFORE PROCEEDING. You can do this directly on the printer itself, or in the Fiery Command Workstation.
- Option 1 – Fiery Controller (This method is way easier)
- The paper you want to use must already be in the printer. If you didn’t already put it in the tray, go do it now.
- Open Fiery Command Workstation on your computer (if you don’t have this, call IT)
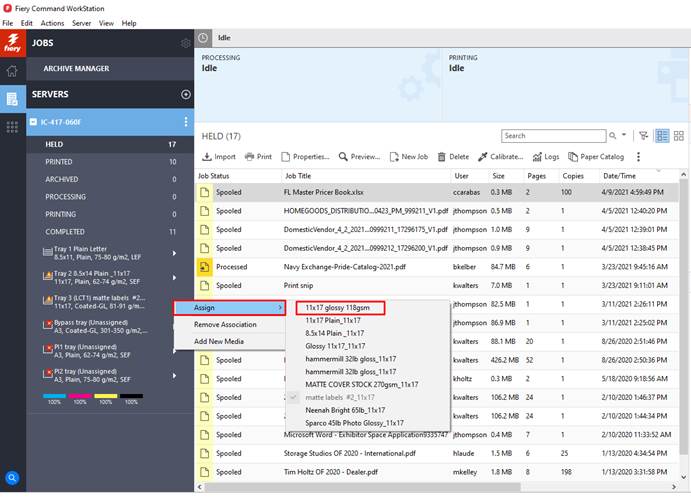
- On the left, you’ll see tray listings. Click the arrow next to the tray you want to modify, and click Assign.
- Click the paper setting you want.
- Option 2 – On the Printer Itself (This method has horrible UX. Just saying.)
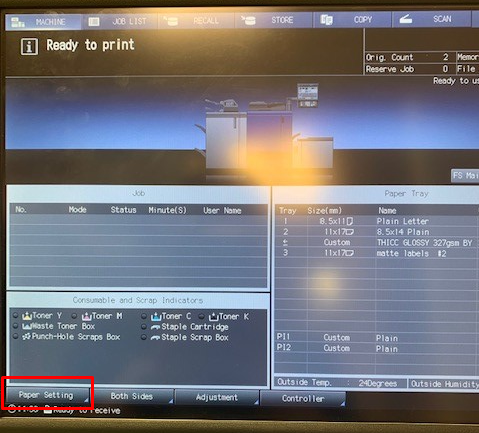
- Check the setting for the tray you loaded on the “home” screen of the printer. If it doesn’t match the paper you’ve loaded, tap “Paper Setting” on the bottom left corner of the screen.
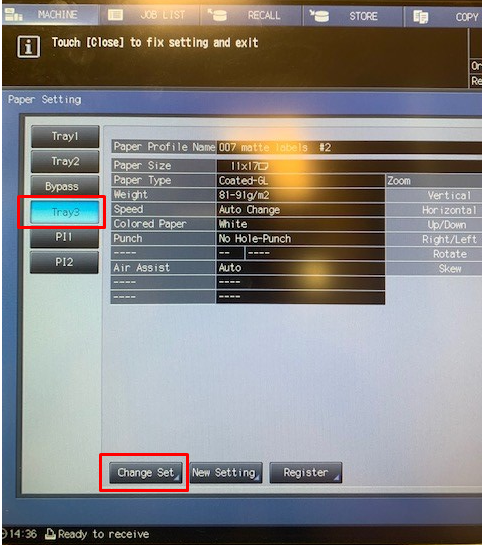
- Tap the Tray you want to modify, and then tap Change Set.
- The next screen that loads will show you the current setting. Tap “Search” at the bottom to find the one you want to use.
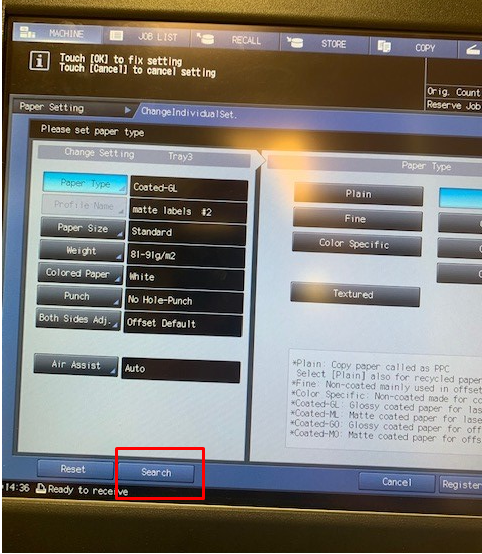
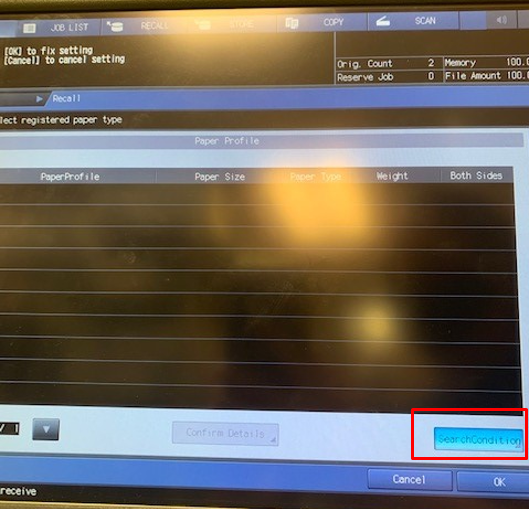
- The search screen almost loads with one or no options because it has horrible UX, like I said above. Tap “Search Condition” on the bottom right to modify the search.
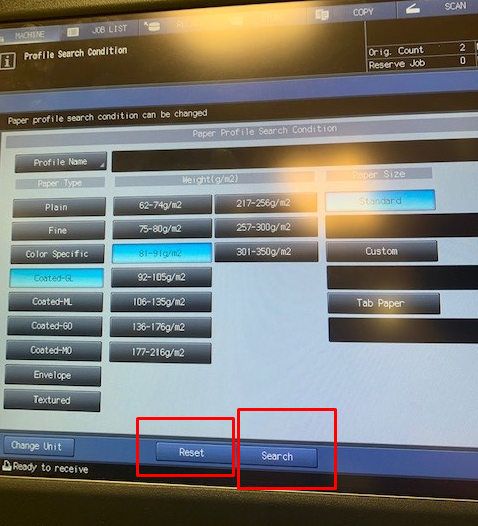
- On the next screen, Tap “Reset” and then “Search”
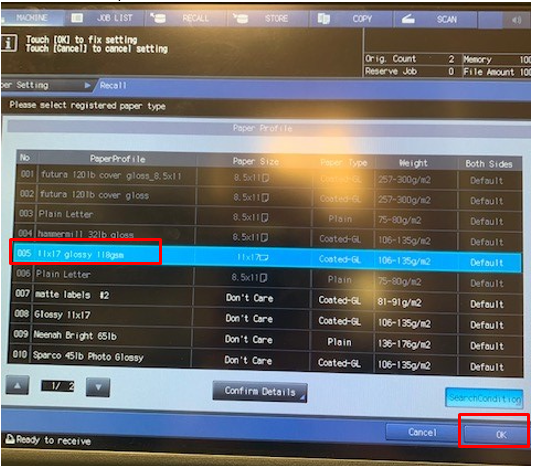
- Now you should see a whole bunch of paper options. If needed, you can use the arrows on the bottom left to scroll down. Select the paper you want, and then tap “OK”
- One more screen will load. Tap close on this screen. You’re done!
- Option 1 – Fiery Controller (This method is way easier)
- Now open your file, go to Print, select the Konica Minolta (Optimus Prime) from the Printer selector, and then click “Properties”

- If you have followed the directions above, you can choose the “SaddleStitchGlossy” preset under Presets at the top right. If you need to manually adjust settings, you can follow the steps below.
- IMPORTANT NOTE: There is a currently an issue with our driver that prevents finishing options from making their way to the printer. If you print and the catalog does not fold and staple, you should locate the job under printed in the Fiery Command Workstation after you’ve sent it, right click on the job, and choose Properties.
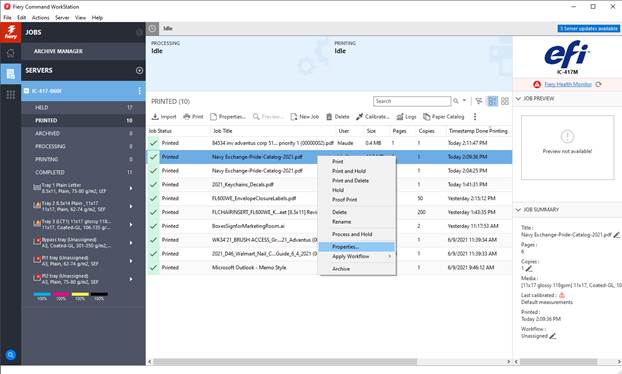
- Change fold to Multi half fold, and then Staple to Center 2 position.
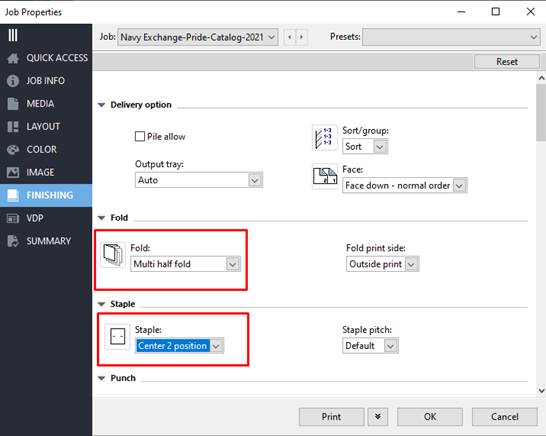
- Click Print to print again right away, or OK to save the setting if you need to adjust anything else before printing.
- IMPORTANT NOTE: There is a currently an issue with our driver that prevents finishing options from making their way to the printer. If you print and the catalog does not fold and staple, you should locate the job under printed in the Fiery Command Workstation after you’ve sent it, right click on the job, and choose Properties.
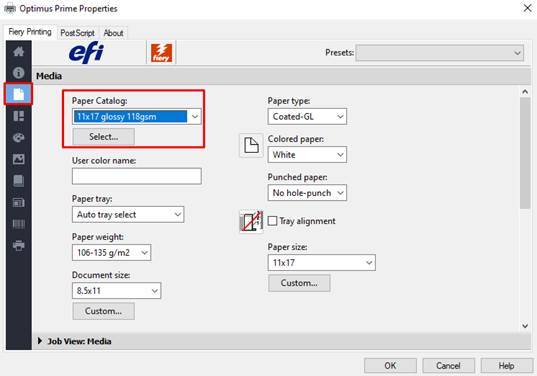
- TO MANUALLY SET CATALOG OPTIONS: Change the “Paper Catalog” setting to the paper you just set in the steps above. You can do this from the Quick Access screen if you’ve saved it there previously, otherwise, it shows up under the “Media” tab. It is very important to use this setting, versus choosing the tray. Optimus does not view these two things as equal. ALWAYS use the Paper Catalog setting. I have spoken.
- Next, go to the Booklet Wizard, located under the Layout tab. Click “Launch Wizard”
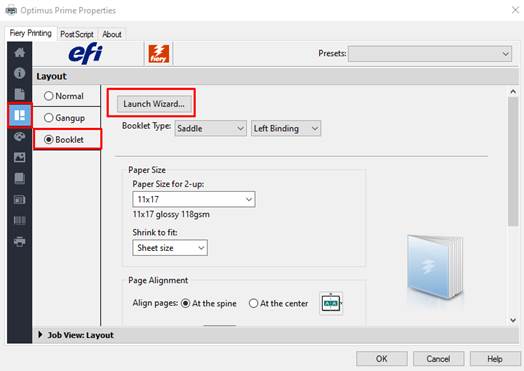
- Walk through the Wizard. For our standard catalogs, the settings you want are:
- Screen 1 – Booklet Type, Saddle and Binding: Left
- Cover & Content Screen – settings as shown below:
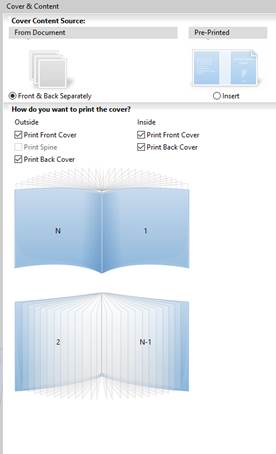
- From this point, you can hit Next twice, and then finish, but here are the settings for reference:
- Size and Media: 11×17
- Layout: Align Pages at the Spine
- Now, go to the Finishing Tab. Change fold to Multi half fold, and Staple to Center 2 position.
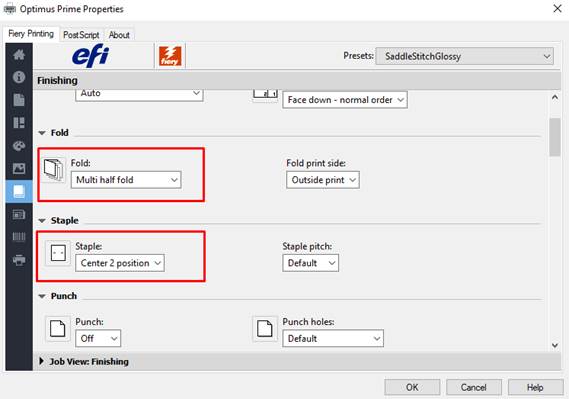
- That’s the last setting. Click “Okay” on the properties screen, set your quantity and Print.
